Importing Users
Introduction
In addition to Adding Users in aMember, you can also import a list of users from a .csv file. The advantage of adding users via import is that you can add multiple users at once without having to add each user separately. All you will need is a .csv file with the following data for each user (see screenshot below).
- Login
- Password
- First Name
- Last Name
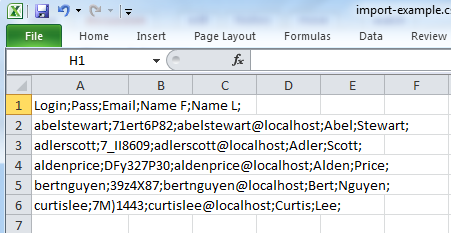
Once you have this, importing users is a simple 4 step easy process.
Importing Users
Login to the Admin Panel.
Select "Import Users" under "Users" from the options on the left side of the screen.
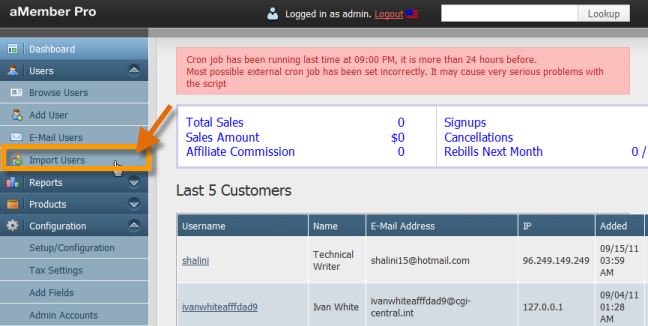
The Import Users screen will be displayed.
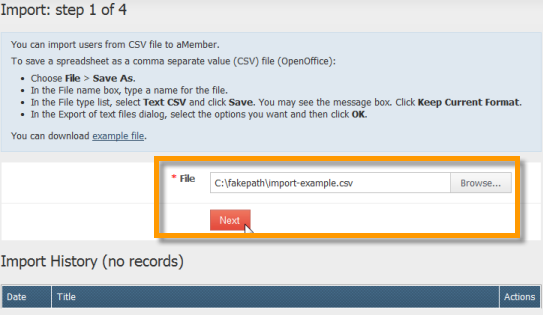
Step 1: Selecting File to Import
- Click the "Browse button" on Step 1 of the Import Users wizard screen and select the .csv file to import from your computer. The file path will be inserted into the "File" field.
- Click the "Next" button.
Step 2: Assigning Fieldnames, Subscriptions and Delimiters
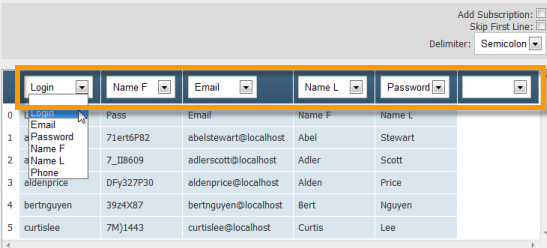
Step 2 of the Import Users wizard displays the list of imported users from the file in columns. On this screen, you can assign fieldnames to the imported columns, setup subscriptions and select delimiters to be used for the import.
Assigning Fields
Assign the fields for each column of data by clicking on the arrow
button at the top of the column and selecting a field name.
Adding Subscription
Select the "Add Subscription" checkbox to enable sending newsletters
and other communications to the user. Leave the checkbox blank to
disable sending newletters and other communications to the users being
imported through the Import process.

Skip First Line
Select the "Skip First Line" checkbox to skip importing the first line. This feature is userful when the first line in the .csv file contains the column headings.

Selecting Delimiter
Select the delimiter used for separating records in the .csv file by clicking on the arrow in the "Delimiter" field and select delimiter from available options.

Once you have assigned the fields and set up subscription options and delimiter, click on the "Next" button to go to Step 3 of the import wizard.
Step 3: Preview Import Data
Step 3 of the import wizard is where you can preview the data to see if the fields have been assigned correctly and that the information is displayed in the right columns. If information is missing for any of the fields, you will be prompted to enter it in this screen.
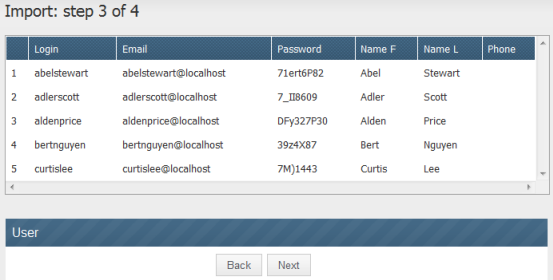
Review the data:
- If everything seems ok, click on the "Next" button to finalize the import.
- If the fields are not assigned properly, click on the back button and make the required changes, and then come back to this page by clicking on the "Next" button.
Step 4: Select Import Mode
Step 4 is where you can select the Import Options for the data to be imported.
Go to the bottom of the imported data list. Click on the arrow in the "Import Mode" field below the users list and select the import mode from available options.

Click the "Do Import" button to complete the import. The user records from the .csv file will be imported into aMember as users. You can edit them as required. See Editing Users for more information on how to edit user information.