PaypalPro
This article describes the process of configuration of PayPal Pro payment integration for aMember.
Create and Configure a Test of Live PayPal Account
Create and Configure a Sandbox Account
This is optional and needed for tests only, you may skip it for quick live setup.
- Visit http://developer.paypal.com and create a developer's account.
- Click on the "Sandbox" tab, then click on "Create Account".
- Create a Sandbox account just as you would a normal Paypal account. None of the information entered needs to be your actual information.
- To verify the account return to the Developer Central and select the email tab. All emails sent to your sandbox account will appear here. Find the verification email and follow the steps to verify the account.
- On the Overview menu click on Add Bank Account in the left column.
- Enter anything into Bank Name and click "Add Bank''.
- Return to the Overview menu, and click on Confirm Bank Account in the left column, then click on Submit to confirm the account.
- Return to the Overview menu, and click the Add Credit Card link in the left hand column of the page.
- Write down the Card Number, Expiration Date and Card Verification Number, you will use this card to test your Direct Payment installation.
- Click the Add Card button to complete this process.
Create and Configure a Live Account
- Follow all the instructions to set up your normal business PayPal account to use Web Payments Pro, including account verification, back account verification and signing up for Web Payments Pro. (This last step may take 24-48 hours for approval, and you have to wait to continue.)
Apply for Website Payments Pro
- Return to your Business Account Overview page and click the Merchant Tools tab
- Under Website Payments Pro, click Learn More
- Under Getting Started, click Submit application
- Complete the application form and click Continue.
- On the Application Approved page, click Getting started with PayPal (this step may be delayed for live accounts)
- Follow the link to accept the billing agreement (this step may be delayed for live accounts)
- You are taken to a page for API Setup. For details on this, continue on to STEP 3: Setting up your API credentials
Setting up your API credentials
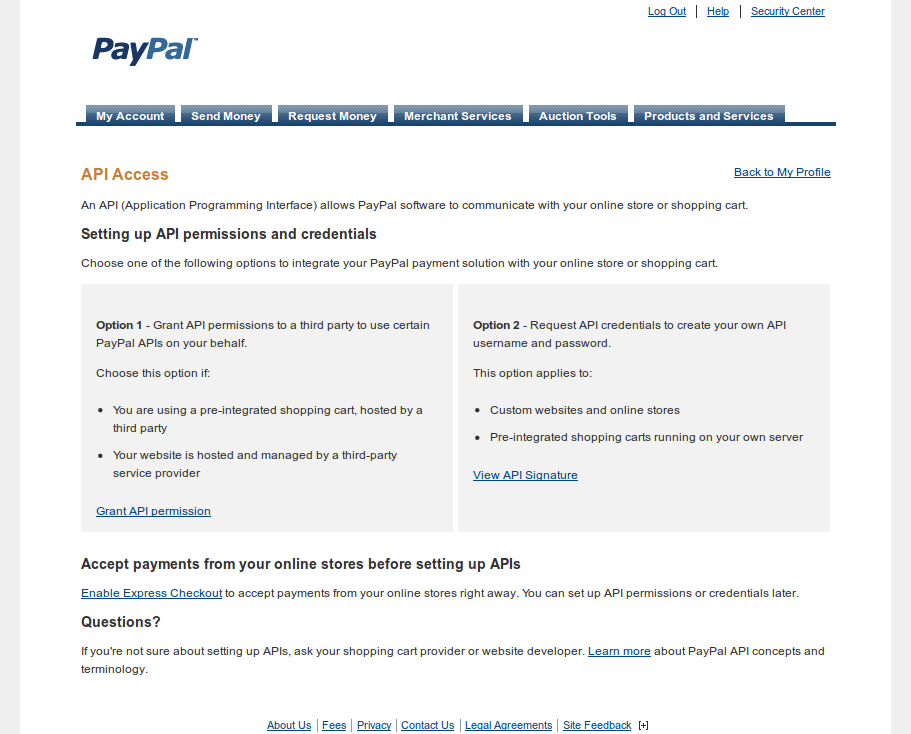
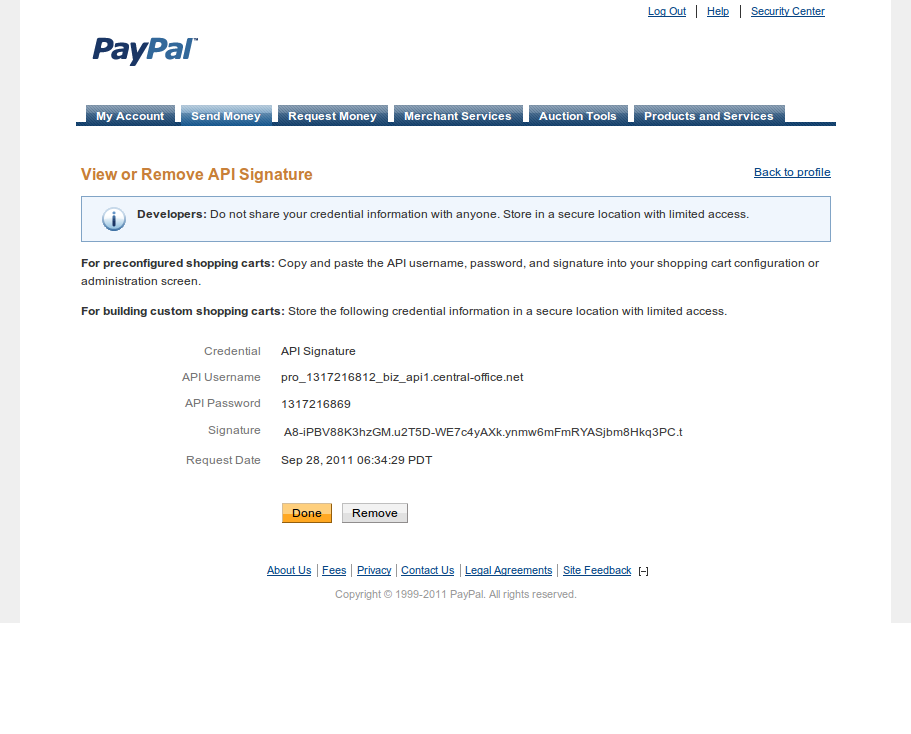
Follow these steps to get your API Signature. If you are testing with a Sandbox account, repeat these steps for both your Sandbox and Live accounts.
- Log in to your PayPal Business account.
- Click the Profile subtab located in the top navigation area.
- Click the API Access link under the Account Information header.
- Click View API Signature link (Option 2).
- Write down the values listed next to API Username and Password.
Configuring the aMember Pro PayPal Pro plugin
- Login into your aMember Pro control panel.
- Go to aMember CP -> Configuration -> Add-ons.
- Enable cc module if it was not enabled before, click Save
- Enable paypal-pro plugin in payments plugin list, click Save
- Go to aMember CP -> Configuration -> Setup/Configuration -> PayPal Pro
- Copy/paste API Username, API Password and API Signature you have received on the step 3, click Save. It is important to specify if it is Sandbox account or not.
PayPal IPN Configuration
To configure your PayPal account to work with aMember, follow these steps:
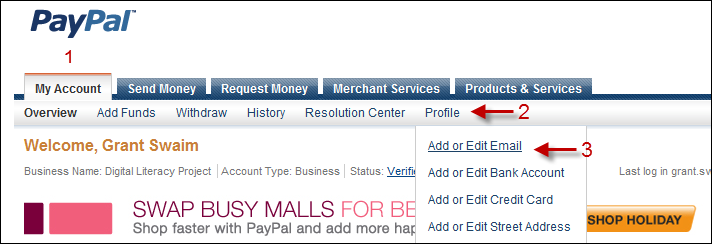
- Log into your Premier of Business PayPal account and click on the "My Account" tab.
- Hover over the "Profile" menu link.
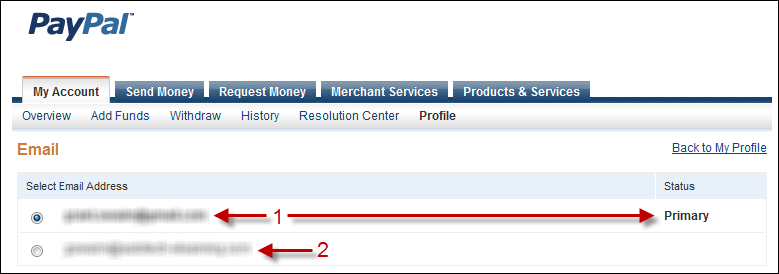
- Click on the "Add or Edit Email" link.
- Make sure the email listed as "Primary" matches the email entered in Step 3 on the aMember PayPal Pro configuration page.
- List any alternative emails that are listed in PayPal in the box referenced in Step 5 on the aMember PayPal Pro configuration page.
Configure your Instant Payment Notification (IPN) settings by following these steps:
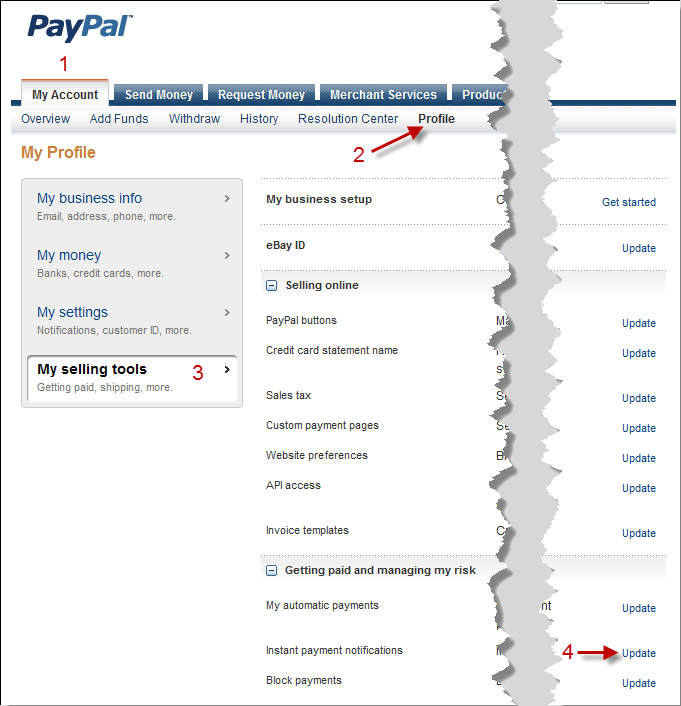
- Click on the "My Account" tab.
- Click on the "Profile" link in the top sub-menu bar.
- Click on "My Selling Tools" in the left panel.
- Click on the Instant Payment Notifications "Update" link.
- Click on "Edit settings" button.

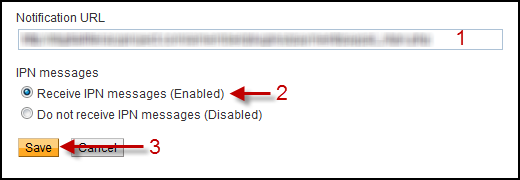
- If "IPN Notification URL" is empty, enter your IPN Notification URL in this box. This link is listed at the very bottom of the aMember PayPal Setup / Configuration Page. If the configuration field is not empty, keep it as is. For aMember, it is only important that IPN is enabled. The IPN URL does not matter.
- Make sure that the IPN messages are "Enabled".
- Click on the "Save" button.
