Product Options Addons
Introduction
In this example we will show you how to add options to a physical product, the sample will be a portrait which will have two client options, backing and frame which will adjust the total charged.
Method
Following on from the above we will create a product 'Spiffy Portrait' customers will be able to select the options.
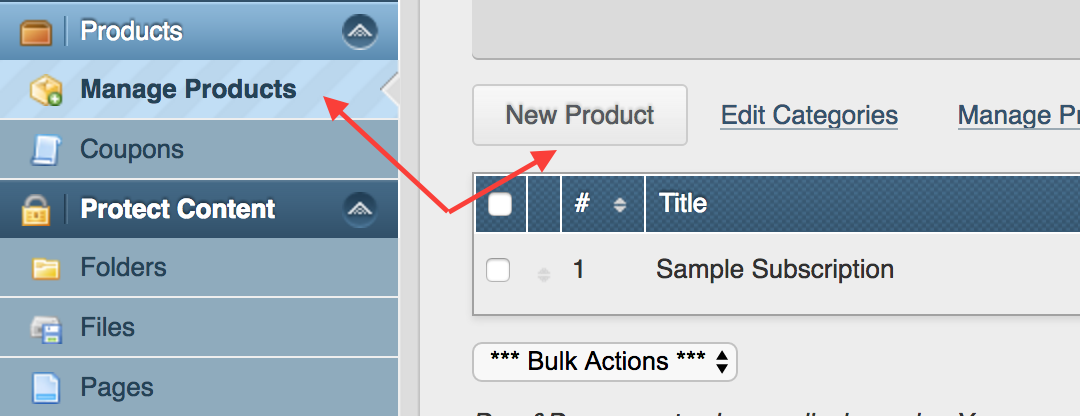
As usual from your aMember Control Panel select 'Manage Products' then 'New Product'
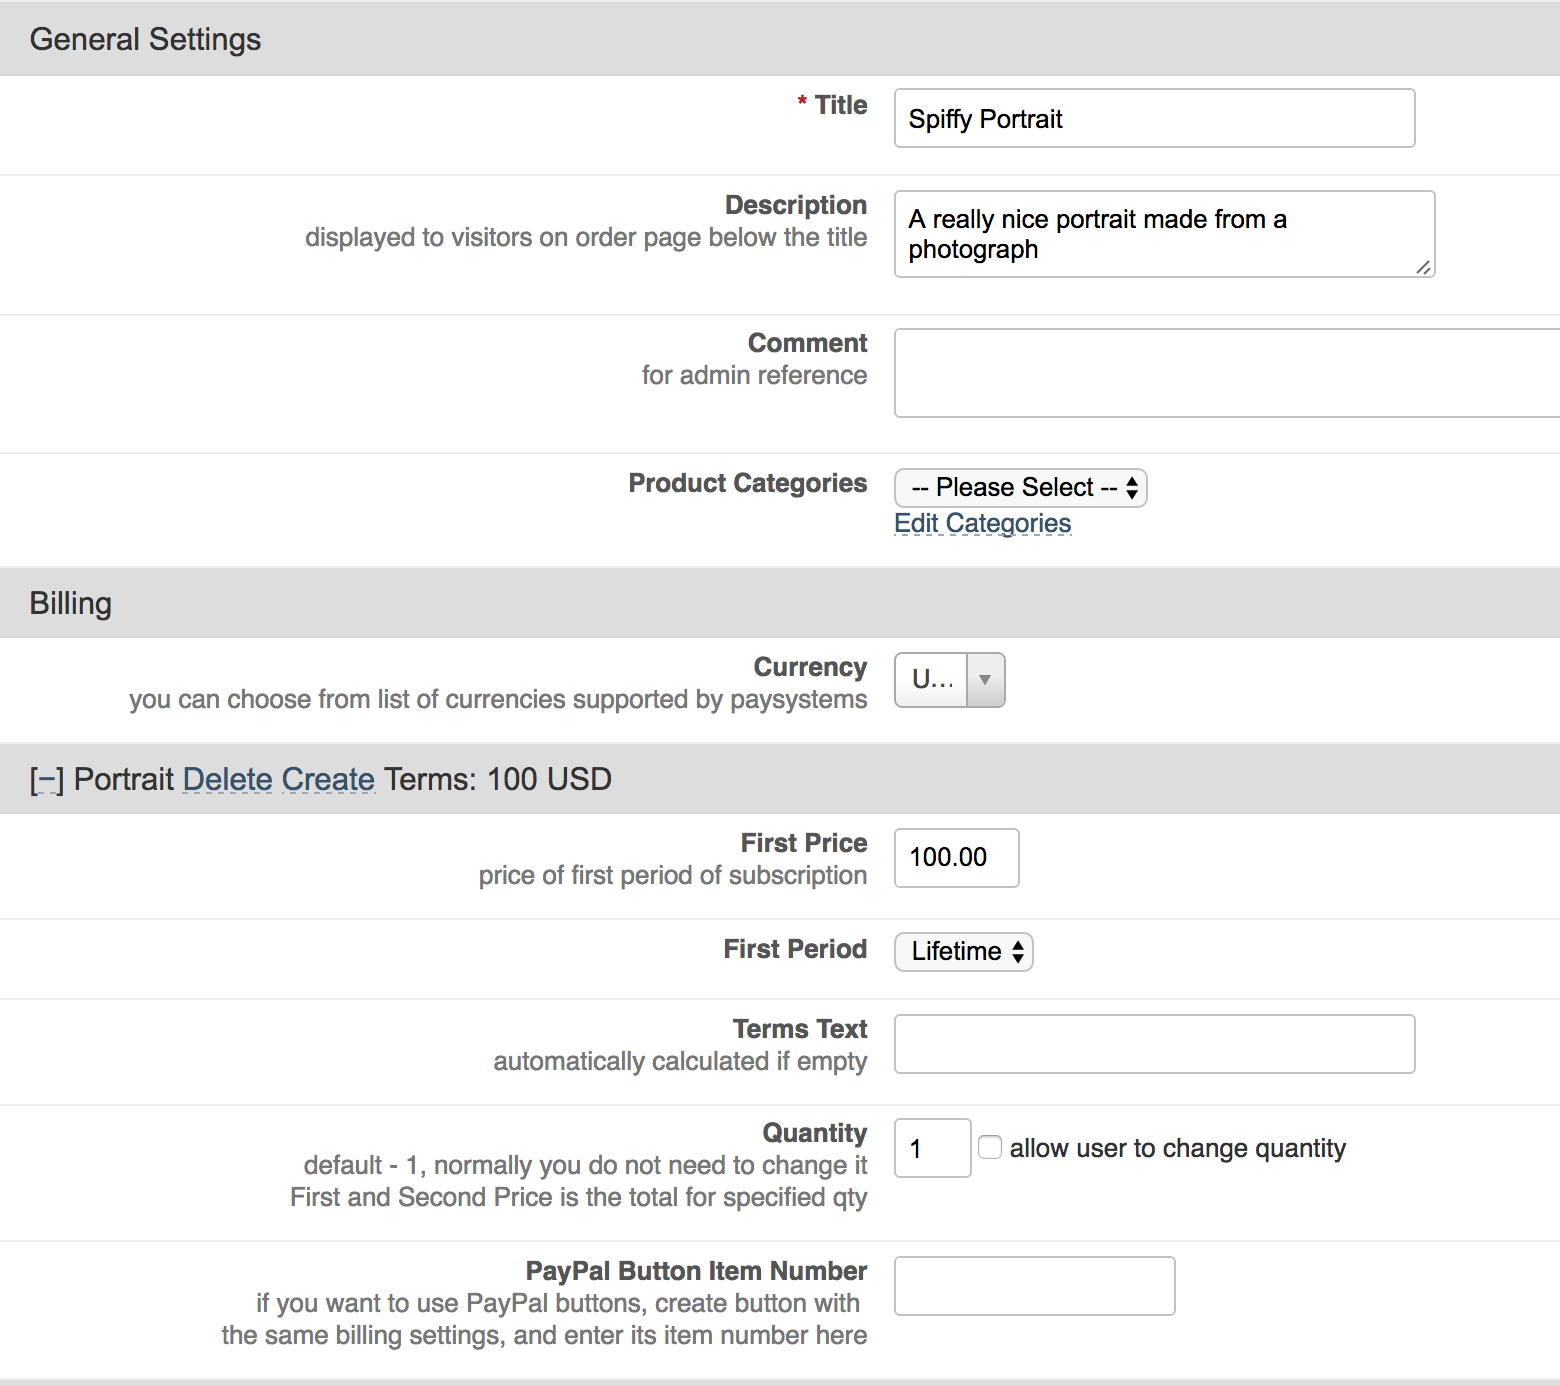
In this example the 'Title' is 'Spiffy Portrait' with a 'Description' of 'A really nice portrait made from a photograph', initially we will have the basic product information as shown;
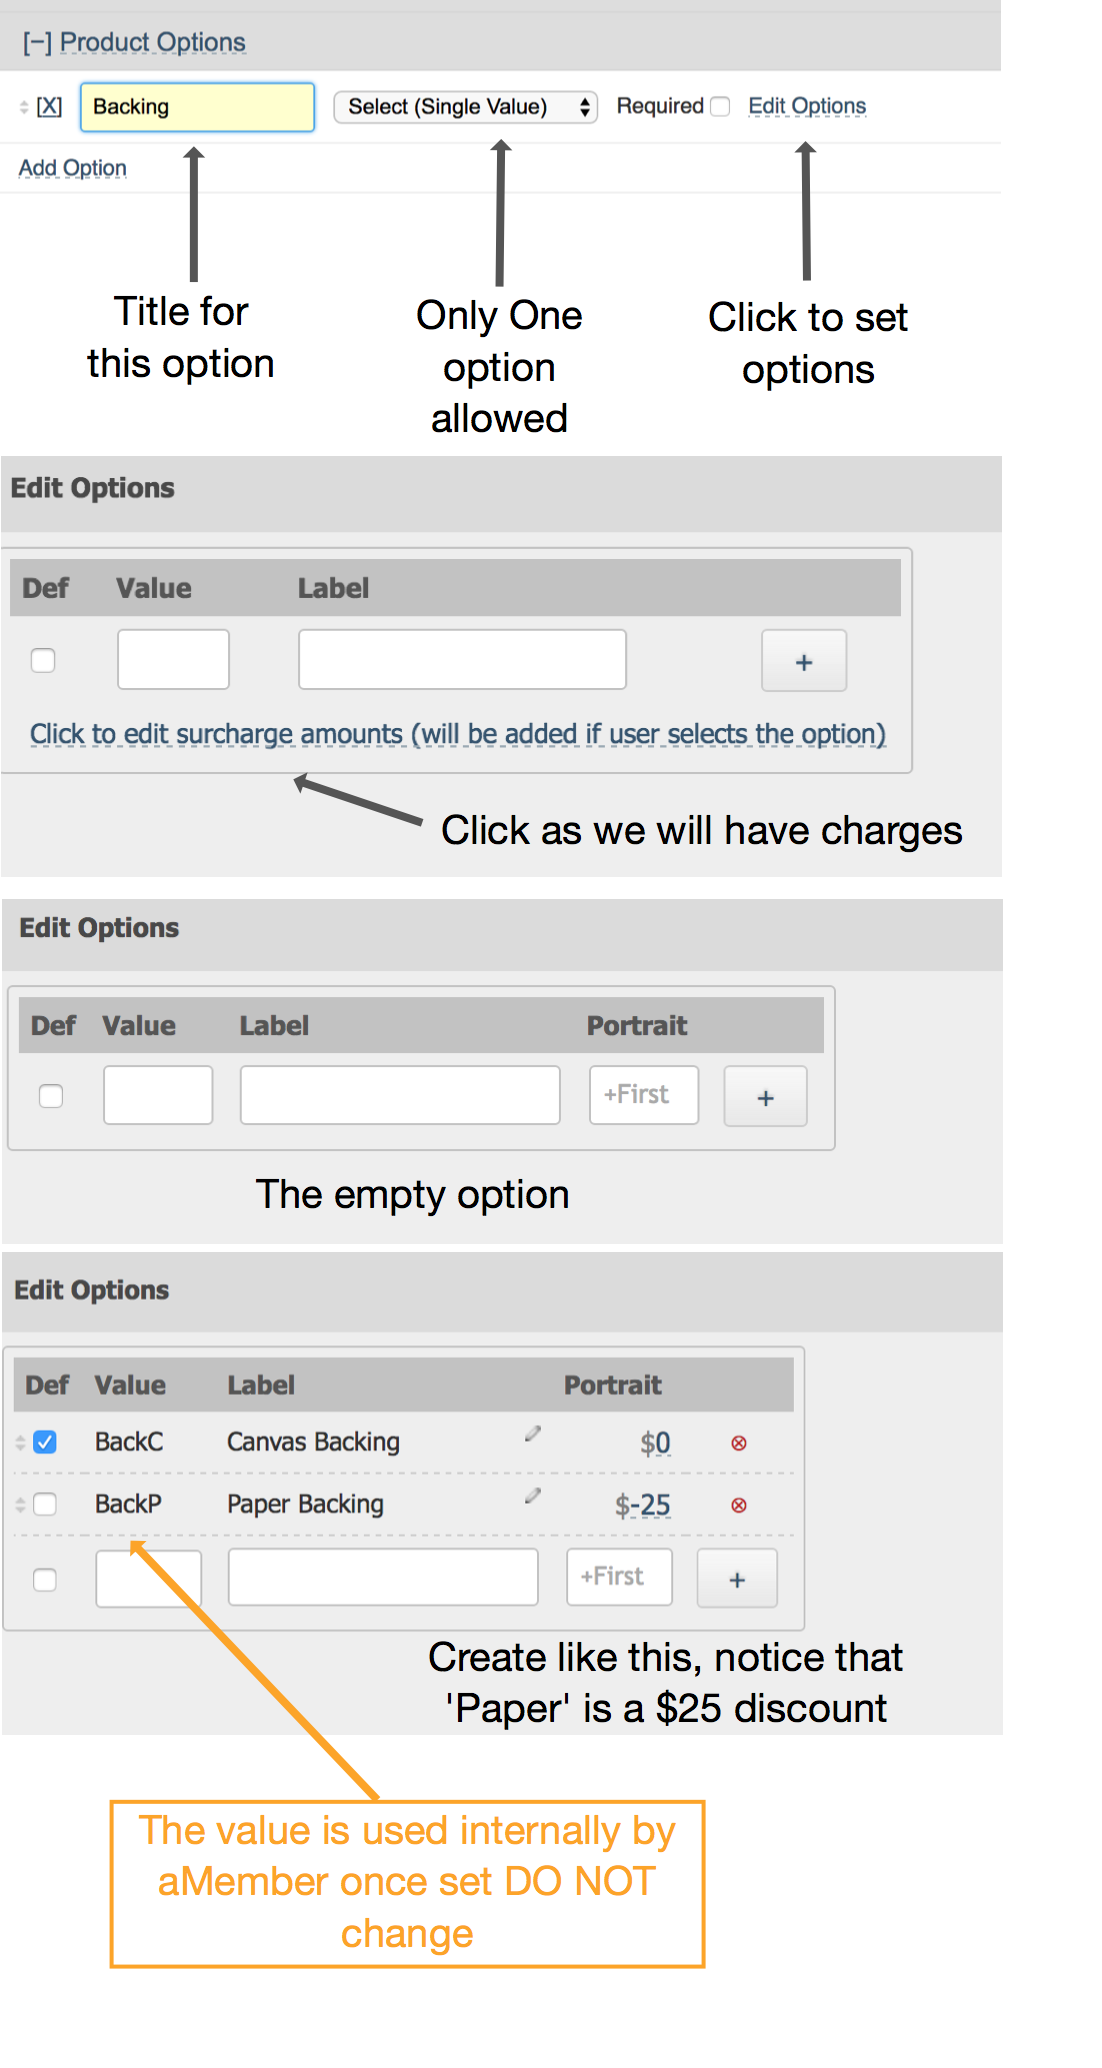
Now near the bottom in the Product Options, click 'Add Option'

Follow the image below to add two choices to the option, this one is for the backing of our portrait, standard canvas is no change and we set that as the default, the client can select Paper and receive a $25 discount (don't forget the minus in front).
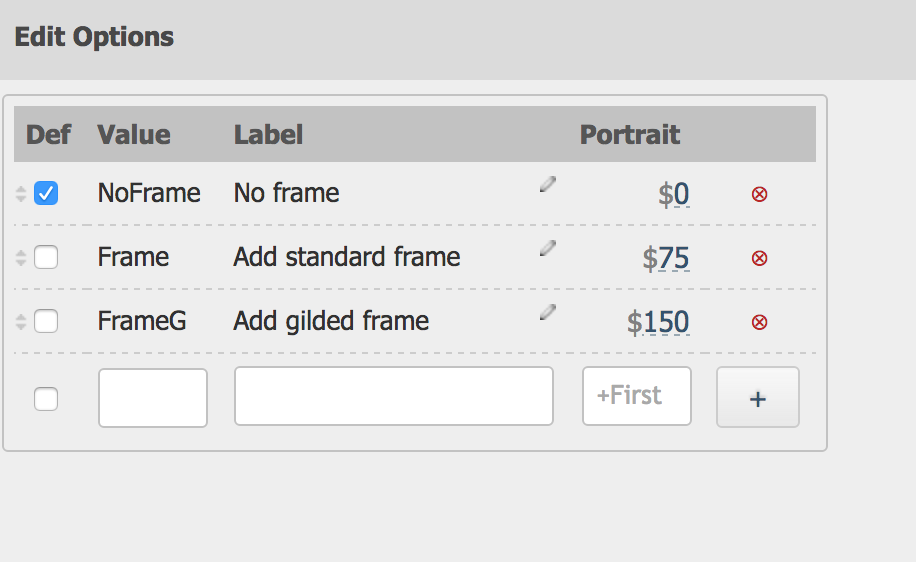
Now add the frame option with the following to complete our example product
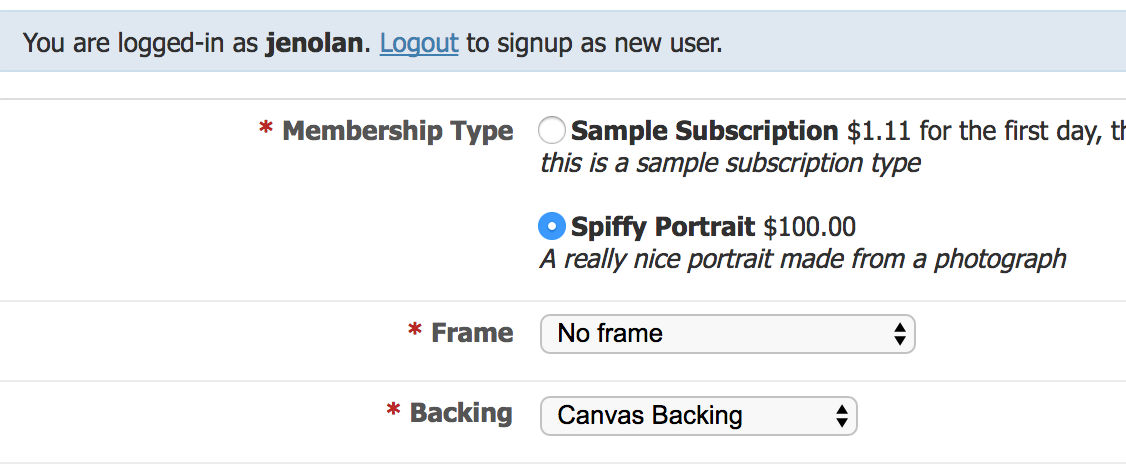
When saved and back at the product you should see both options, notice that 'required' has been set so that the client will always need to make a selection.

Don't forget to save your product --- Next we will see how the system works for the client and a completed payment in the admin section.


Purchase in admin view invoice
