Helpdesk
Introduction
The "Setup/Configuration: Helpdesk" page is where you can set up help desk options like the text to be displayed on the helpdesk page and notification options when an admin responds to a helpdesk ticket.
Accessing Helpdesk Setup Options
- Login to the Admin Panel.
- Select "Setup/Configuration" from the options on the left side of the screen. See Setup/Global for more information on how to do this.
- Click the "Helpdesk" button.

The "Setup/Configuration: Helpdesk" page is displayed.
Editing Text on Helpdesk Page
You can display the text of your choice on the Helpdesk page. This could include contact information, helpdesk hours and helpdesk procedures.
To set up the text to be displayed on your helpdesk page, just type it in or edit it in the text box in the "Intro Text on Helpdesk Page" field.

Enabling/Disabling Customer Notifications
aMember allows you send a notification to your customers when the admin responds to a helpdesk ticket so that the customer knows that their problem is being addressed.
- To enable customer notifications, select the checkbox in the "Send Notification about New Messages to Customer" field.
- To disable customer notifications, leave the checkbox in the "Send Notification about New Messages to Customer" field blank. If it is already selected, click to unselect it.

Editing Email Notification Template
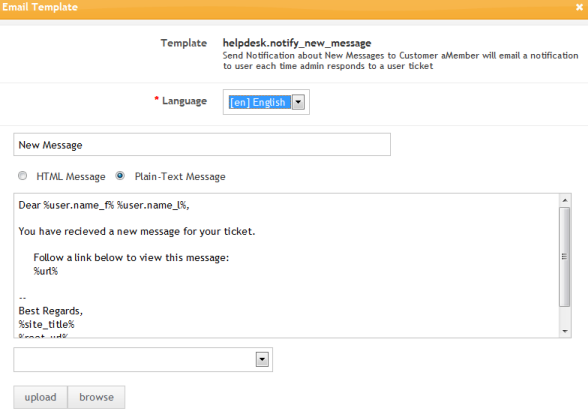
You can upload a template of your choice for the helpdesk notification sent to the customer when the admin responds to a helpdesk ticket. If no template is specified, the default aMember template is used for these emails. You can upload a custom template or edit the default template according to your requirements.
To edit the template being used:
- Click on the "Edit E-mail Template" link.
- A new window will be opened displaying the template in editable fields. Make changes to the template as required.
- You can click on the "Upload" button at the bottom of the window to upload a new template.
- Click the "Browse" button to view all uploaded templates and select one of them.

Remember to click the "Save" button to save any changes you made to the helpdesk settings.